Resin 3D Printers
Resin Printers
| 🧭 How to Use the Resin Printers |
|---|
| Resin printing produces high-detail, smooth parts using UV-cured liquid resin. This guide explains how to prepare models, operate the machines, clean up, and safely handle resin. Cost: $0.10 per gram (includes supports). After curing, weigh your print at the 3D printer display and deposit payment into the blue 3D printer fund container. |
Resin Printer Overview
Our resin printing setup includes:
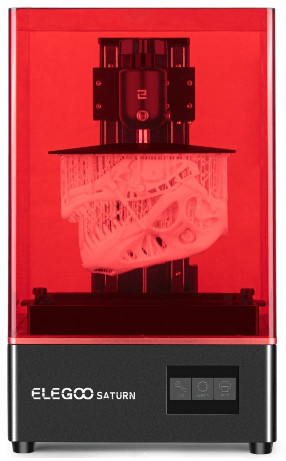
- Elegoo Saturn (V1) – large-format resin printer
- Original Prusa SL1S SPEED – high-speed, high-precision printer
- Elegoo Mercury Plus – combined wash and cure station
- Original Prusa CW1S – full 4-in-1 wash, dry, and cure station
- Custom Air Filtration System v1.0 – ventilation system beneath the printers
All resin printing must be done with gloves and the air filtration system turned on.
Air Filtration System
The Resin Printer Air Filtration System (Version 1.0) removes fumes from under the printers and filters the air.
A black power dial is attached to the cord on the left side of the table.
To use:
- Turn the dial clockwise to power on the fan.
- Ensure you can feel airflow being pulled beneath the printers.
- Leave it running while resin printers are active.
- Turn off after cleaning and sealing resin bottles.
Workflow: Printing and Post-Processing
Step 1: Prepare Your Model
- Design or download your 3D model in
.stl,.obj, or.3mfformat.
- Recommended software:
- Elegoo Saturn: CHITUBOX Basic (officially supported)
- Prusa SL1S: PrusaSlicer (officially supported)
- Add supports, drain holes (for hollow models), and proper orientation to prevent suction failures.
- Export your sliced file:
- Saturn →
.ctb - SL1S →
.sl1s
- Saturn →
Step 2: Prepare the Resin
- Stir the resin gently using a silicone spatula to re-mix pigment.
- Inspect for debris or clumps. If found, filter resin through a fine mesh back into the bottle and refill with clean resin.
- Keep resin below the maximum fill line.
Step 3: Load and Print
- Ensure the build plate is level and tightened.
- Insert the USB drive and select your file.
- Confirm the resin vat is filled and clean.
- Start the print and monitor the first few layers for adhesion.
Post-Processing (Using IPA)
Step 1: Wash the Print
- Use isopropyl alcohol (IPA, 95–99%) to clean uncured resin from your model.
- Place the print in:
- Elegoo Mercury Plus basket, or
- Prusa CW1S wash container.
- Elegoo Mercury Plus basket, or
- Wash for 2–6 minutes depending on size.
- After washing, let the print dry fully before curing.
Step 2: Filtering & Reusing IPA
- IPA can be filtered and reused several times:
- Pour through a fine mesh or paper filter into a clean container to remove cured bits.
- Once IPA becomes cloudy or thick, replace it.
- Dispose of used IPA by evaporating it in a ventilated area or curing the residue with UV light before discarding.
Step 3: Cure the Print
- Place the dried model in a curing station:
- Use the Mercury Plus or CW1S.
- Cure for 2–6 minutes with even UV exposure.
Resin Printers
| Printer | Original Prusa SL1S SPEED | Elegoo Saturn (V1) |
|---|---|---|
| Image | 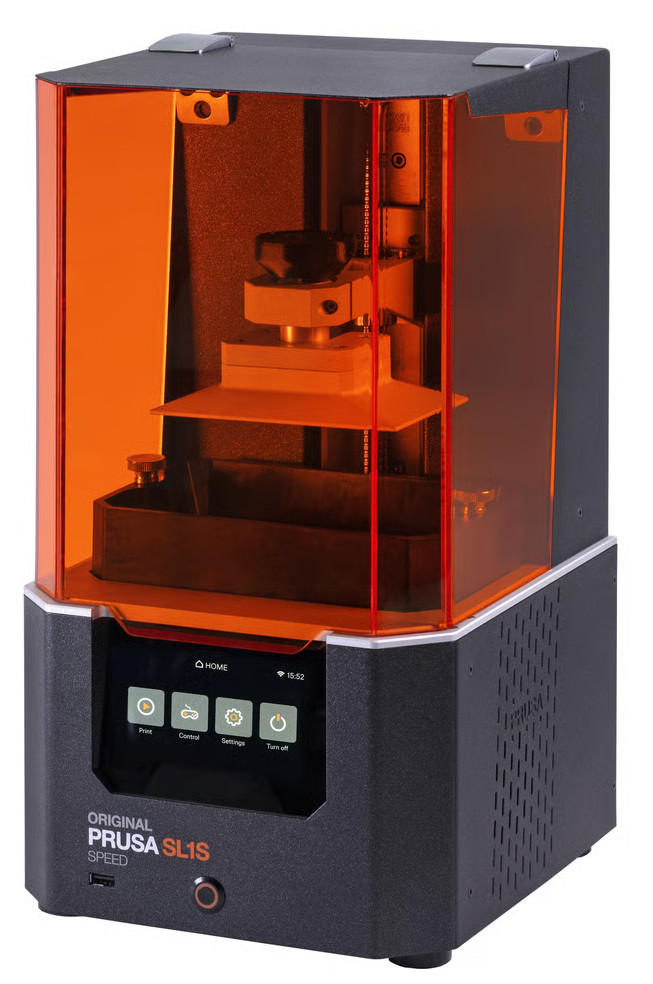 |
 |
| Technology | MSLA (Masked Stereolithography) | MSLA (Masked Stereolithography) |
| Build Volume | 127 × 80 × 150 mm | 192 × 120 × 200 mm |
| Display | 5.96″ monochrome LCD (2560×1620) | 8.9″ monochrome LCD (3840×2400) |
| XY Resolution | 49 µm | 50 µm |
| Layer Height | 0.025–0.1 mm | 0.05–0.15 mm |
| Exposure Speed | 1.4–2.4 sec/layer | ~40 mm/h |
| Software | PrusaSlicer (SLA Mode) | Chitubox Basic |
| Connectivity | LAN / USB | USB |
| Status | 🟢 Operational | 🟢 Operational |
| Documentation | Prusa SL1S SPEED | Elegoo Saturn |
Post-Processing Stations
| Tool | Elegoo Mercury Plus | Original Prusa CW1S |
|---|---|---|
| Image | 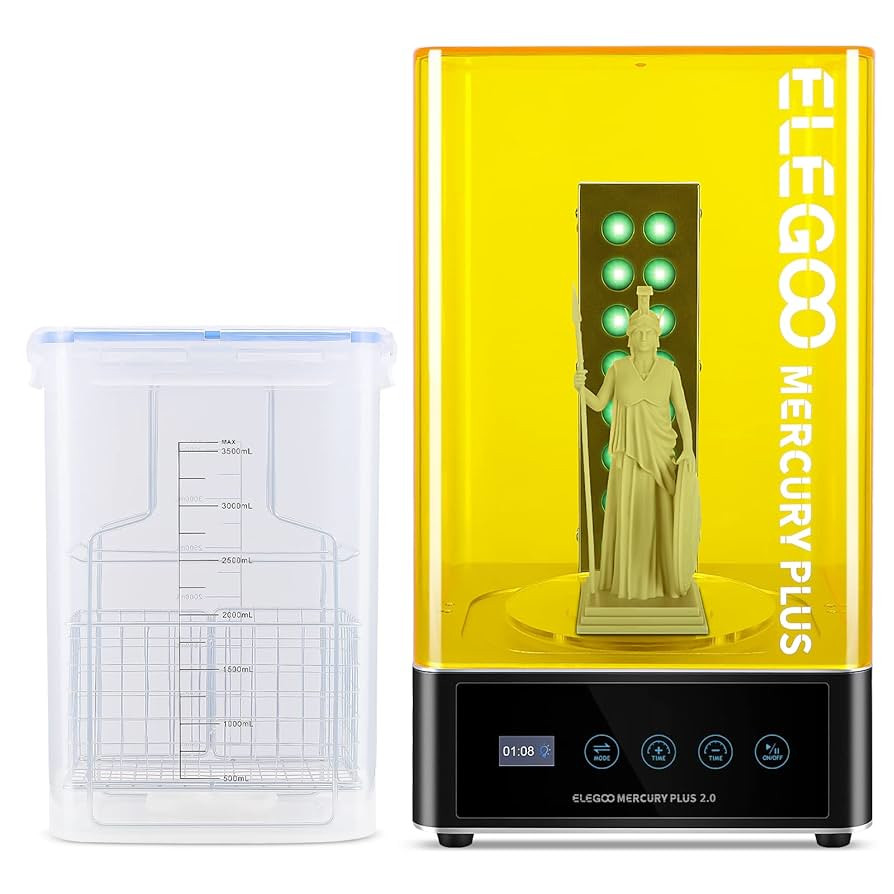 |
 |
| Function | Wash & Cure | Preheat, Wash, Dry & Cure |
| Wash Volume | 230 × 135 × 160 mm | 120 × 90 × 150 mm |
| Curing Light | 405 nm | 405 nm |
| Control | Touch buttons | Rotary knob & display |
| Status | 🟢 Operational | 🟢 Operational |
| Documentation | Mercury Plus V2.0 | Prusa CW1S |
Maintenance & Safety
Weekly
- Clean resin vats and build plates with IPA.
- Check and tighten bolts or handles.
- Ensure FEP film is clear and undamaged.
- Keep curing stations clean and IPA sealed when not in use.
Monthly
- Clean LCD glass and optical parts.
- Replace cloudy IPA.
- Verify resin bottles are sealed and labeled correctly.
Proper Disposal
- Do not pour resin or IPA down the drain.
- Cure liquid resin until fully solid before disposal.
- Filter and cure resin sludge before throwing away.
- Keep gloves and rags used with resin in a sealed waste container.
Friendly Printing Practices
- Use one printer at a time during busy hours.
- Always turn on the air filtration system while printing.
- Keep resin bottles sealed when not in use.
- Filter resin and IPA regularly to extend their lifespan.
- Clean the station after every print: wipe surfaces, vacuum if needed, and ensure no spills remain.
- Report issues using Report a Problem.
Tool Master
| Name | Role | Contact |
|---|---|---|
| Noah Albers | Resin Printing Tool Master | Member Page |
categories: tools