Vacuum Former
Info
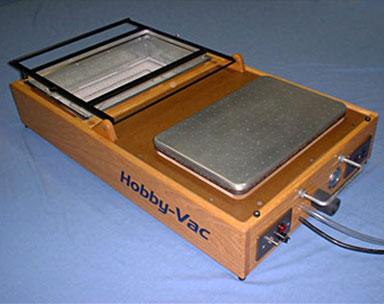
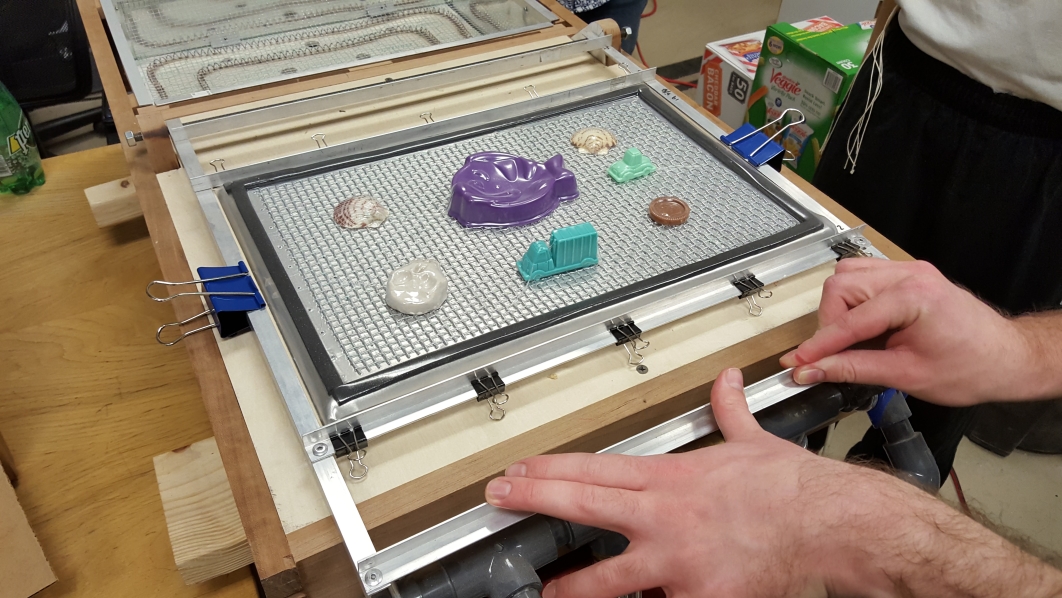
We bought the plans to build the Hobby Vac vacuum former machine so we can have it available for making plastic parts from clay/foam/wood/potato carvings and forms called the “buck”. One side contains heating elements and the other has a table or “platen” with tiny holes drilled in it. Underneath is a vacuum pump and air tank. On top is a picture frame of sorts on a hinge where you snap in a sheet of thermoplastic. Switch on the heat and flip the frame over to the heat. While it heats the plastic turn on the vacuum to suck the air out of the tank. Once the plastic starts to sag and melt, flip the frame over your buck you’ve made earlier from clay, foam, or wood, etc. and open the valve for the air tank. It will suck air through the holes in the platen into the now empty air tank. And since it’s covered in melted plastic it will force it to form around your buck and copy very minute details. We should be able to pull the details from a quarter!
Notes on usage
From Wayne and David at 2 Story Props - Huntsville, AL
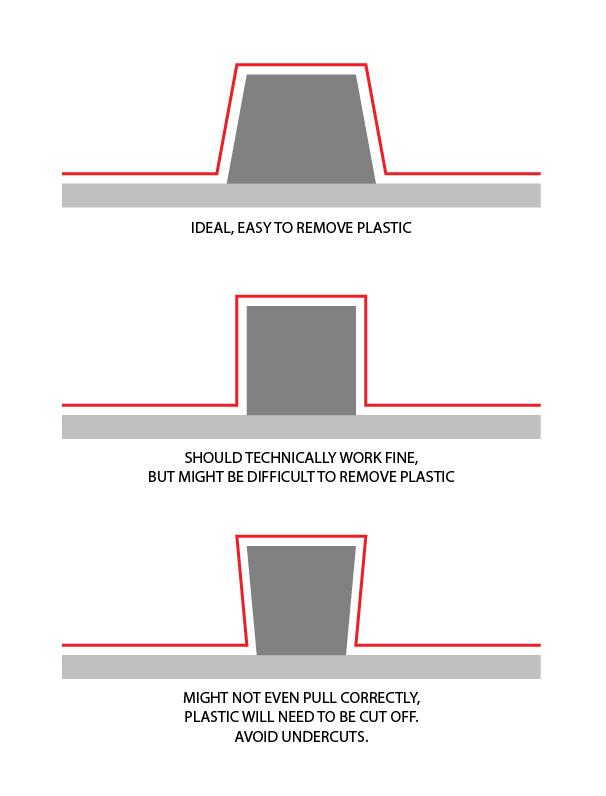
The only real requirements for a vacuum forming buck is that it’s 1) sturdy enough to maintain its shape when being pulled down by vacuum, 2) it’s heat resistant enough not to melt under hot plastic, and 3) there are no undercuts to trap the buck in the cooled plastic (that is to say, all the vertical surfaces are 90 degrees or shallower). So long as your printing material accounts for 1 and 2, and your 3D model accounts for 3, you should be good to go.
Main thing to keep in mind is that the buck has to hold its shape under pressure as it will be condensed under the weight of atmosphere. It should be solid and have no undercuts. Also, you will need to verify the PLA will not bond or melt to the hot plastic. The sheet is about 350F when it is pulled. The term “undercuts” tends to throw off people who are new to vacuum forming. When designing your 3D models, try to keep this in mind when addressing the vertical shapes on your models.
There’s only so much general information you can learn on the process before your machine and first-hand experiences start telling you more than the internet will ever teach you. The specifics will vary machine-by-machine as you will develop a set of proper procedures specific to your machine. But here’s some things off the top of my head.
- Learn how to correctly and safely operate your machine.
- Learn what plastics you can and cannot pull effectively.
- Learn what your suppliers are actually providing you. I used some “ABS” at one point and it ended up being some more akin to a rigid vinyl - it didn’t work at all, and retained heat and elasticity for like 20 minutes.
- We recommend USPlastic.com for ABS and styrene sheet. We have had consistently good results with the materials specifically from this supplier. We have used other suppliers with mixed results.
- Learn at what point the plastic is ready and don’t let it sit under the heating elements for much longer. We often joke about testing to see what happens when we let the plastic fully melt, but realistically this is an extremely dangerous thing to try. Just don’t do it.
- Warm up your platen (the “vacuum base” with the holes in it) and your buck prior to pulling anything, especially in cooler weather. A cold metal platen and a cold buck can cause the warm plastic to warp and buckle as it cools. Just turn on the heating elements for a few minutes while you set up.
- Try offsetting your buck from the platen by placing it on some washers to get a crisper pull toward the base of your buck. A small wire rack placed under you buck is a common alternative to this.
- WEAR GLOVES and be conscientious of visitors poking around nearby while you are using the machine.
I would also advise you and your Maker Space to understand that this type of machine is specifically for heating and pulling plastic sheet to shape over a rigid form, and nothing else. At the Makers shop here, “tinkering with the tool itself” is too common of a mentality, and instead of actually making things with the tools, the tools themselves often get mistreated out of a unfocused sense of “curiosity.” That accounts for a good number of times our laser cutter was out of commission early on, for example, but people here have since started learning to respect the tools. In the case of a vacuum forming machine, that curiosity can lead to fire, dangerous electrical shortages, and pretty extreme injury. Respect this tool and use it with a heaping amount of caution.
How to use
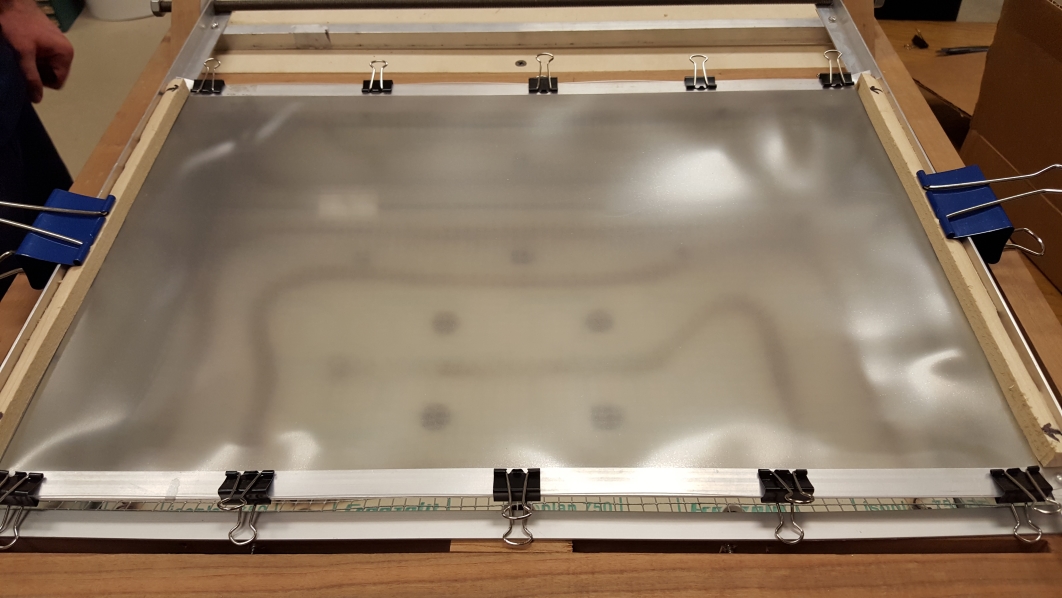
- Set the plastic into the frame (you may need to trim it down to fit right to the edges for as close to exact fit as possible).
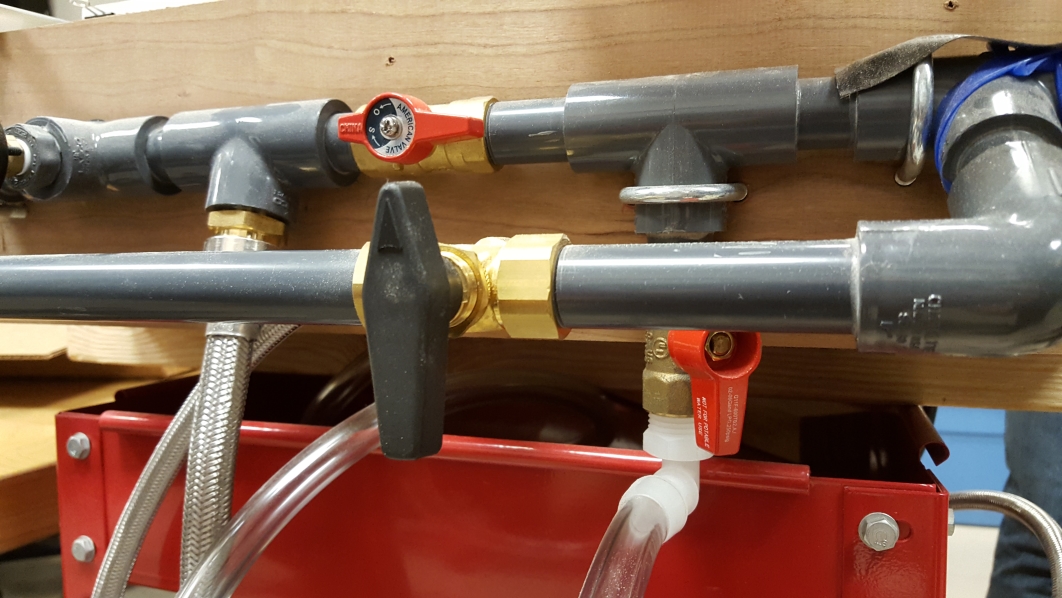
- Suck the air out of the tank with the vacuum pump with the black valve arrow pointing left. Once at 26-27 in/mg turn off the vacuum pump at the same time as turning the black valve pointing straight up.

- Start the heater to slightly melt the plastic sheet. Wait 2 min 30 sec from heater power on to be ready for pulling.
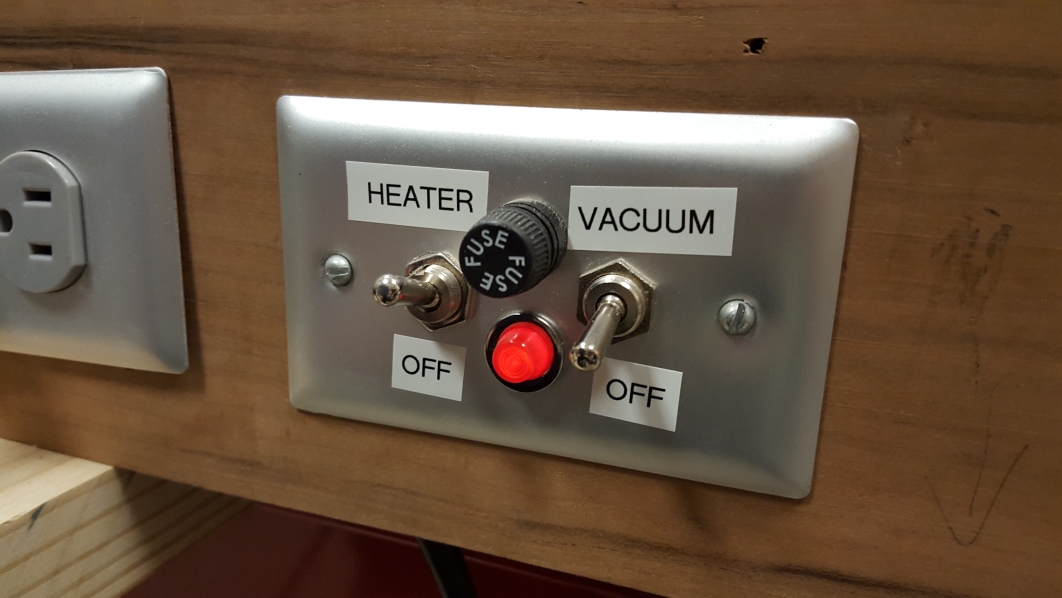
- Flip the frame and sheet over the platen with the bucks and open the valve to let the air through the platen into the tank pulling the plastic tight around whatever you put on the platen, holding its shape when it cools. Turn off the heater and take the clips off the frame to take your newly formed plastic off the frame and remove your bucks.
Tool Masters
These members have the most knowledge and use of this tool. Please make sure you check out with one of them before using this tool for the first time.
- Josh Pritt
- Tony Bellomo